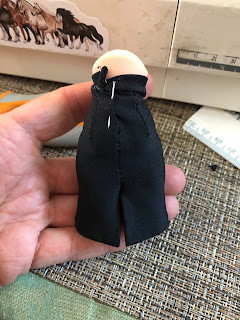
The first part was actually fairly easy. I got out one of my seem rippers and opened up the skirt so I could trace it out, adding the new bits, and I had a first draft of a pattern. I knew it was likely to need adjusting, so I was not overly concerned with how it came out. The material was also switched up for the new skirt from a broadcloth to a 4-way stretch fabric. I am not a fan of 4-way stretch, especially in miniature, but I tried out the new pattern, didn't finish anything, and sent some progress pics to my friend.
I needed to adjust the placement of the darts and add the waistband. The original had the waistband sewn down and then folded over and glued. So I attempted to replicate that. I thought it looked pretty good. The back was not quite right for my friend though so I adjusted some more things and went into it again. More adjusting, actually using pins to sew (who does these things?), drawing all over my ruler (part of the process), and fiddling a bit more.
Another attempt. Still not approved.
The back was really not working out to my friend's liking (the pin was because I did not have a closure to put in at the time. Then we moved into a different fabric. Maybe the stretch was just not going to work out. So I grabbed some of my regular cotton and I tried it out. The darts were a lot nicer. Since it was decided not to have a closure I put in the stretch material as the waistband so the skirt would be able to go onto the doll. Nope, not approved. Finally my friend came up with the great idea that I make the waistband as a separate piece, like a belt, and glue it on. This is actually how I normally make waistbands. It is so much easier to be precise with all of it. I also noticed the skirt was longer than it was meant to be and adjusted the length. That worked! We decided on a fold-over flap and super thin Velcro for a closure.
So I duplicated the skirt.
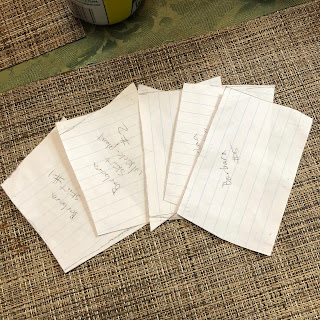
So after 5 hours and a lot of adjusting and trying out different ideas, the 2 "simple" pencil skirts were finished. Other than Velcro, which I have to wait for. I do not like doing removable clothing. Even if once it goes onto the doll it is likely to stay there. It takes a lot of extra work. Even if these were permanent, pattern making takes a lot of time. This was what I started with when I took the skirt apart. Sort of the right shape with some missing bits I needed to add, but a good place to show where to replicate the darts. These were all of the versions of the skirt that I made, including the 2 that got approved. These were all of the versions of the patterns that I came up with to try to replicate the skirt. I'm sure some people get mad when I don't share my patterns. I am not trying to be mean, or discouraging. I share a ton of information about doll making with people as it is. But no, I will not share my patterns. To make a simple pencil skirt took me 5 hours of trial and error. The second skirt took me 7 minutes to make. I also learned a ton about what worked, what didn't work and how things should go together to look the best. That is not something that you can learn if someone hands you everything. Part of being good at making dolls, or good at anything, is practice. And trial and error. Making garbage until you know what works. I have been making dolls for 14 years and have done over 1400 of them. It still took me 5 hours to make a pencil skirt. But it is an awesome pencil skirt. My friend loves it and I can now replicate it quickly, accurately and easily. I have no need for it, but I am going to find a reason for it, lol! Driving dolls may be wearing pencil skirts soon...


1 comment:
I have done that before, it took me over 20 tries to sew a decent saddle pad!
Post a Comment